Hướng dẫn cài đặt streaming video sử dụng Nginx RTMP và FFmpeg trên CentOS 7
Streaming video đã trở thành một phần quan trọng trong ngành công nghiệp truyền thông hiện đại. Với sự phổ biến của các nền tảng video trực tuyến như YouTube, Facebook và Netflix, nhu cầu cung cấp video trực tuyến đang tăng lên. Trong bài viết này, mình sẽ hướng dẫn cách cài đặt một máy chủ streaming video sử dụng Nginx, RTMP và FFmpeg trên hệ điều hành CentOS 7. Mình sẽ hướng dẫn cách cấu hình Nginx để nhận đầu vào RTMP từ các phần mềm như OBS và chuyển đổi chúng sang các định dạng HLS hoặc DASH để phát lại trên các thiết bị khác nhau.
Chuẩn bị:
Server Centos 7, trên đây sẽ cài đặt:
- Nginx: Webserver
- RTMP: Module chạy trên Nginx để nhận luồng tín hiệu video
- FFMPEG: Module nhận tín hiệu và chuyển đổi định dạng từ Video/Audio sang HLS hoặc Dash
Máy client:
- Cài đặt phần mềm OBS để push RTMP video lên server
Mở port trên firewall:
- 1935,
- 80/443
1. Cài đặt Nginx và RTMP module:
Do module RTMP không có sẵn trên repository nên bạn cần cài đặt từ source.
Cài đặt các gói cần thiết để build:
#yum install gcc gcc-c++ make zlib-devel pcre-devel openssl-develDownload và giải nén nginx:
#wget http://nginx.org/download/nginx-1.20.1.tar.gz
#tar -zxvf nginx-1.20.1.tar.gz
Download RTMP module:
#git clone https://github.com/arut/nginx-rtmp-module.gitCài đặt nginx và rtmp:
#cd nginx-1.20.1
#./configure --add-module=../nginx-rtmp-module   //đường dẫn đến rtmp vừa clone về
#make
#sudo make install
Sau khi cài đặt xong bạn đã có thể sử dụng nginx, các file và thư mục cấu hình của nginx như bên dưới:
  nginx path prefix: "/usr/local/nginx"
  nginx binary file: "/usr/local/nginx/sbin/nginx"
  nginx modules path: "/usr/local/nginx/modules"
  nginx configuration prefix: "/usr/local/nginx/conf"
  nginx configuration file: "/usr/local/nginx/conf/nginx.conf"
  nginx pid file: "/usr/local/nginx/logs/nginx.pid"
  nginx error log file: "/usr/local/nginx/logs/error.log"
  nginx http access log file: "/usr/local/nginx/logs/access.log"
Để quản lý service nginx dễ dàng hơn, bạn có thể tạo file service:
#vim /etc/systemd/system/nginx.service [Unit]
Description=The NGINX HTTP and reverse proxy server
After=syslog.target network.target remote-fs.target nss-lookup.target
[Service]
Type=forking
PIDFile=/usr/local/nginx/logs/nginx.pid
ExecStartPre=/usr/local/nginx/sbin/nginx -t
ExecStart=/usr/local/nginx/sbin/nginx
ExecReload=/usr/local/nginx/sbin/nginx -s reload
ExecStop=/bin/kill -s QUIT $MAINPID
PrivateTmp=true
[Install]
WantedBy=multi-user.targetSau đó reload daemon và enable service:
#systemctl daemon-reload
#systemctl enable nginx.service
Vậy là có thể quản lý trạng thái nginx bằng lệnh:
#systemctl start nginx.service
#systemctl status nginx.service
#systemctl stop nginx.service
2. Cấu hình nginx và rtmp
Thêm vào file nginx.conf cấu hình rtmp để nhận luồng tín hiệu:
rtmp {
	server {
		listen 1935;
                server_name live.tradacongnghe.com;
		chunk_size 4096;
		application live {
			live on;
			record off;
			meta copy;
			hls on;
			hls_path /root/stream/hls; //đường dẫn đến folder hls file
			hls_fragment 3;
			hls_playlist_length 60;
		}
	}
}
Thêm cấu hình http để phát video:
http{
....
	server {
		listen 80;
		server_name live.tradacongnghe.com;
		location / {
			# CORS setup
			add_header 'Access-Control-Allow-Origin' '*' always;
			add_header 'Access-Control-Expose-Headers' 'Content-Length';
			# Allow CORS preflight requests
			if ($request_method = 'OPTIONS') {
				add_header 'Access-Control-Allow-Origin' '*';
				add_header 'Access-Control-Max-Age' 1728000;
				add_header 'Content-Type' 'text/plain charset=UTF-8';
				add_header 'Content-Length' 0;
				return 204;
			}
			types {
				application/vnd.apple.mpegurl m3u8;
				video/mp2t ts;
			}
			add_header Cache-Control no-cache;
			alias /root/stream/hls/; //đường dẫn đến folder hls file

		}
	}
}
3. Cài đặt FFMPEG
#yum install epel-release
#rpm --import http://li.nux.ro/download/nux/RPM-GPG-KEY-nux.ro
#rpm -Uvh http://li.nux.ro/download/nux/dextop/el7/x86_64/nux-dextop-release-0-5.el7.nux.noarch.rpm
#yum install ffmpeg ffmpeg-devel
Sau khi hoàn thành 3 bước trên là bạn đã xây dựng thành công server streaming video, để test hoạt động các bạn làm tiếp theo các bước bên dưới:
1. Chuyển đổi tín hiệu RTMP sang chunk list HLS bằng FFMPEG:
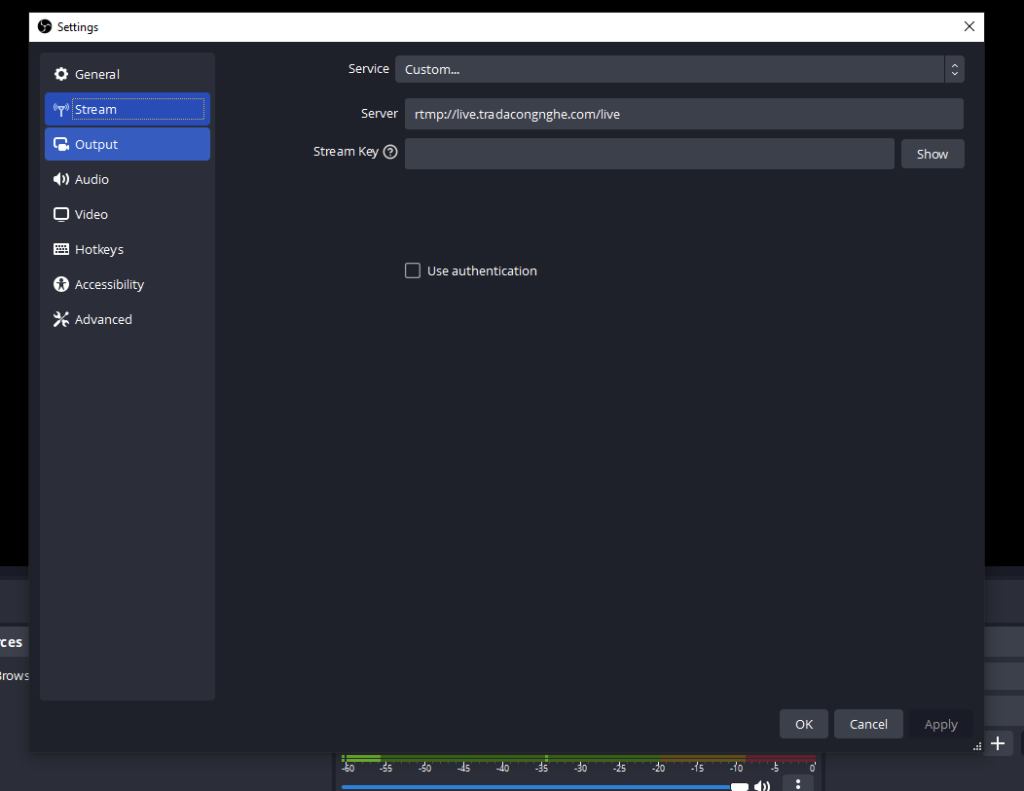
#nohup ffmpeg -i rtmp://live.tradacongnghe.com/live -c:v libx264 -preset veryfast -tune zerolatency -c:a aac -b:a 128k -strict -2 -f hls /root/stream/hls/trada_live.m3u8 > ffmpeg.log 2>&1 &2. Cấu hình RTMP trên OBS:
Truy cập OBS => settings => stream
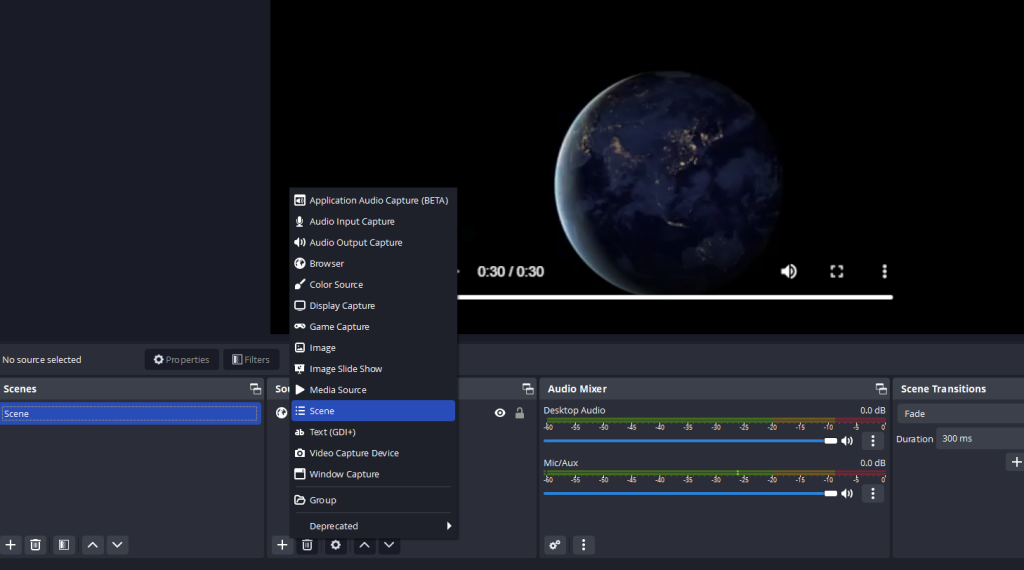
Thêm source từ các nguồn Webcam/Máy tính,…..
3. Truy cập link video để xem kết quả
http://live.tradacongnghe.com/trada_live.m3u8Với link này bạn có thể truy cập trực tiếp trên trình duyệt nếu có cài extension play HLS hoặc bạn có thể gắn link vào phần mềm player ví dụ như VLC hoặc gắn trực tiếp vào code.
Nếu có bất kỳ vấn đề gì cần hỗ trợ vui lòng liên hệ chúng tôi qua email: tradacongngheteam@gmail.com, Xin cảm ơn!